Building a diorama is, for many modelers, the most complete way to express their feelings for this hobby. It is not just about assembling a figure or placing a vehicle on a base: it is about telling a story, freezing a moment in time and making it believable. A tank advancing along a muddy path, a mechanic bent over an engine in the paddock of a historic race, a scale urban scene with its own lights and shadows… Each diorama is a world of its own.
The interest in this discipline continues to grow, and rightly so. The diorama brings together almost all modeling techniques in a single project: brush and airbrush painting, weathering and rust effects, vegetation, ground textures, LED lighting, working with resins and plaster, creating static water… It is demanding, yes, but also immensely rewarding. And the best part: you can start with simple projects and scale up in difficulty as you gain confidence.
At Ministry of Hobby, we work with modelers from all disciplines —static models, figures, military vehicles, slot, diecast— and we know that the most common question when someone approaches the world of dioramas is not "What should I buy?" but "Where do I start?". This page aims to answer that: what a diorama is, how to choose the right materials, what techniques exist, and how to avoid the mistakes that hold back many beginners.
If you already have experience, you will also find useful references here: product comparisons, specific technical advice, and answers to questions that continue to arise even among veteran modelers. Because there is always something new to learn in dioramas.
What is a diorama and why it deserves a place in your hobby
A diorama is a three-dimensional scale scene that represents a moment, a place, or a specific situation. It can be as small as a 10 cm base or as ambitious as a complete display case with vehicles, figures, buildings, and landscape. The most common scale in military and figure modeling is 1/35, although 1/72, 1/48, and 1/32 are also very common —the latter especially popular among slot enthusiasts who want to contextualize their cars in a circuit or paddock environment.
What distinguishes a diorama from a simple base is the narrative. A well-executed diorama makes you look and wonder what happened before and what will happen next. To achieve this, it is not enough to glue pieces: you have to think about composition, the natural lighting of the scene, how the elements interact with each other, and the contrasts of color and texture.
From a technical point of view, the diorama integrates several sub-disciplines:
- Terrain modeling: clay, plaster, epoxy putty, polystyrene foam, and landscaping materials.
- Vegetation: static grass, shrubs, moss, dried leaves, miniature trees.
- Special effects: static and moving water, dust, mud, snow, smoke.
- Painting and finishing: colour backgrounds, washes, filters, pigments, chipping, and weathering techniques.
- Lighting: small-sized LEDs integrated into streetlights, windows, or vehicles.
All of this makes the diorama the most complete project in modeling, and also the one that offers the most reward when the final result exceeds expectations.
How to choose the right materials for your diorama
One of the most frequent questions is where to start regarding materials. The short answer: it depends on the scale, the theme, and the level of finish you are looking for. But there is a practical guide that works for most projects.
Base and structure
The base is the starting point. It can be a wooden board, a shadow box, a perspex tray, or even a recycled can. The important thing is that it is stable and allows you to work comfortably on it. To build the terrain relief, the most versatile materials are extruded polystyrene (the hard type, not the one from fish boxes), polyurethane foam, and two-component epoxy putty.
Ground textures
Here the variety is enormous: natural soils and sands (sieved and dried), commercial landscaping materials, marble dust, coloured plaster, pigments… It is common to combine several to achieve visual depth. Brands like Vallejo, Ammo, and Tamiya have specific lines of textures and ground effects that are very well resolved and yield predictable results.
Vegetation
Vegetation is, along with water, what most "sells" the realism of a diorama. Static grass applied with an electrostatic applicator yields spectacular results; shrubs can be built with dyed natural sponge or with commercial landscaping products; trees range from complete kits to homemade constructions with twisted wire and synthetic foliage.
Paints and finishes
For the finishes of the diorama itself —not for the figures or vehicles— mainly diluted acrylics, powder pigments, and special effects products are used. Vallejo, Ammo, and Tamiya cover almost all needs with specific ranges for terrain, rust, dust, mud, and water.
Main types and differences of dioramas
Not all dioramas are the same. Depending on the theme, scale, and approach, we can distinguish several types that have their own technical and aesthetic particularities.
Military diorama
This is the most historically widespread. Armoured vehicles, infantry figures, combat or campaign life scenes. The 1/35 scale dominates this segment, although 1/72 has a very active community due to the possibility of recreating broader scenes with a greater number of elements.
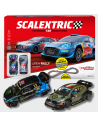
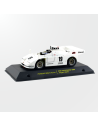
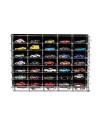
Automotive and slot diorama
Very popular among slot and diecast enthusiasts. It recreates paddocks, pits, circuit sections, period gas stations, or road scenes. The 1/32 scale is the most common here, allowing for the direct integration of slot cars or diecast miniatures as protagonists of the scene.
Fantasy or science fiction figure diorama
Linked to competitive figure painting and the world of miniature games (without entering wargames), this type of diorama prioritises figure painting over the construction of the environment. They are usually small-format pieces, highly worked in painted lighting and skin and material effects.
Nature or landscape diorama
Without vehicles or figures as protagonists, the landscape itself is the subject. A corner of a forest, a rocky coast, a snowy scene… These are projects that prioritise natural textures and light effects.
Architecture or everyday life diorama
Building facades, markets, stations… Very linked to railway modeling, but with its own life in the diorama community. They require good construction materials (paper, cardboard, wood, resins) and a lot of attention to urban detail.
Technical aspects we should know
The diorama has its own technical rules, and knowing them in advance saves many setbacks.
Scale and coherence
All elements of the diorama must be in the same scale or, at least, in scales that coexist credibly. A common mistake is mixing elements of different scales without being aware of it: a railway landscaping tree (1/87) next to a 1/35 figure instantly breaks the realism. Always check the scale of each decorative material before purchasing.
Depth of field and composition
A good diorama has a clear focal point —the main figure, the protagonist vehicle— and secondary elements that enrich without competing with it. The rule of thirds works in dioramas just as in photography: avoid centring the main element exactly in the middle of the base.
Natural and painted lighting
The diorama is built with consideration of how it will be lit when displayed. If the light comes from above and to the right, the shadows cast and the highlights painted on figures and vehicles must be consistent with that direction. Light coherence is one of the factors that most differentiates a good diorama from an excellent one.
Water effects
Static water (specific resins, acrylic gel, products like Vallejo Water Effects or Ammo gels) is one of the most spectacular effects and also one of those that generates the most errors. It is essential to prepare the container well to avoid leaks, apply in thin layers, and let dry completely between layers.
Fixing materials
Vegetation and soil materials are usually fixed with very diluted white glue in water (with a few drops of dishwashing liquid to reduce surface tension) or with specific spray fixatives. Applying concentrated glue directly can deform materials or create unwanted shiny spots.
Practical construction and finishing tips
Beyond technique, there are a series of habits that make the difference between a diorama that disappoints and one that exceeds expectations.
- Plan before gluing anything. Make a provisional mock-up with the elements unglued to see how the composition looks. It is much easier to change something before it is fixed.
- Work in layers. The terrain, vegetation, dust, and mud effects are built layer by layer. Trying to do everything at once leads to disaster.
- Photograph the process. Not only to share it: intermediate photos allow you to detect composition or colour errors that the direct eye sometimes does not see.
- Unify tones at the end. A very diluted wash over the entire base of the diorama (in earth, sepia, or grey tones depending on the environment) unifies the different materials and gives chromatic coherence to the whole.
- Take care of the edges. The edges of the base are the first things seen when the diorama is displayed. A careless finish here ruins the overall impression.
- Do not overdo the effects. Excessive mud, dust everywhere, rust all over… Excess effects detract from credibility. Moderation is almost always the best option.
Common mistakes we should avoid
Most mistakes in dioramas are avoidable if known in advance. Here are the most common:
Incoherent scale between elements
We mentioned it already, but it bears repeating: mixing scales without control is the most visible error and the hardest to correct once the diorama is finished. Always check the scale of each element before buying it.
Bases without background texture
Leaving walls or backgrounds of the diorama smooth and untreated breaks the effect of realism. Even a simple hand-painted gradient greatly improves the sense of depth.
Vegetation too green
Real vegetation is rarely a pure and uniform green. Adding ochre, yellow, brown, and dry tones makes shrubs and grass look realistic. Saturated green without nuances immediately reveals synthetic materials.
Not securing loose materials properly
Sand, soil, leaves… If not secured properly, the passage of time (or simply moving the diorama) causes everything to come loose. Final spray fixative and diluted glue are essential.
Incoherent painted lighting
Figures with lights coming from below and shadows pointing upwards, or vehicles with highlights on the wrong side… Light incoherence is subtle but the eye detects it even if the viewer does not know exactly what is wrong.
Overusing shine in wet effects
Fresh mud shines, yes, but dry mud does not. Surface water has reflections, but wet ground has a much duller shine. Calibrate the level of shine of each effect according to the state you are representing.
Recommendations for beginners and advanced users
If you are starting
Your first diorama does not have to be a masterpiece. We recommend starting with a small base —no more than 15x15 cm— and a single protagonist element: a lone figure, a small vehicle, a minimal scene. The objectives of the first project should be to learn to texture ground, apply basic vegetation, and work on colour coherence. Nothing more.
Regarding materials, Vallejo and Ammo have specific starter kits for terrain and effects that allow you to explore various techniques without a large investment. Tamiya also has very accessible products to start with textures and pigments.
If you already have experience
The qualitative leap usually comes from mastering painted lighting and water effects. If you have not yet worked with static grass applied with an electrostatic applicator, you will be surprised by the result. And if you want to take the narrative to the next level, work on the story your diorama tells before you start building: a diorama with a clear script always proves more convincing than one that simply accumulates well-executed elements.
For advanced users, the integration of LEDs is one of the resources that has the most impact on display and photography. There are very compact and easy-to-install solutions that completely transform the presentation of a night or interior scene.
| Scale |
Common use |
Human figure size |
Typical level of detail |
| 1/72 |
Military, aviation, wide scenes |
~25 mm |
Medium-low |
| 1/48 |
Military, aviation, combined with 1/72 |
~35 mm |
Medium |
| 1/35 |
Standard in military diorama |
~50 mm |
High |
| 1/32 |
Automotive, slot, paddock |
~55 mm |
High |
| 1/24 |
Vehicles, detailed figures |
~70 mm |
Very high |
Frequently asked questions about dioramas
What materials do I need to make my first diorama?
To start, you need a rigid base, some material to model the terrain (extruded foam or plaster), white glue, sieved sand or soil, basic vegetation materials (static grass or dried moss), and acrylic paints to unify tones. That is more than enough for a first project.
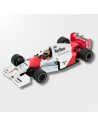
What scale is best for a car or slot diorama?
The 1/32 scale is the most common in this field because it is the same used by slot cars and many collectible diecasts. It allows for the direct integration of cars as protagonists of the scene without the need to manufacture custom parts.
Can I use soil and sand from the garden?
Yes, but they need to be sieved and dried well before use. Wet soil can cause mould over time. It is also advisable to sterilise it in the oven at low temperature to eliminate possible organisms that degrade the material.
How do I make realistic water in a diorama?
The simplest way is to use specific products like Vallejo Water Effects, Ammo gels, or two-component polyurethane resins. The key is to apply in thin layers, let dry completely between layers, and prepare the mould well to avoid leaks. For moving water, textured acrylic gel applied with a brush or stick yields good results.
How do I secure static grass so it doesn't fall off?
Apply a layer of very diluted white glue over the area where you want the grass, place the static grass immediately (with an electrostatic applicator or simply pressing), and once dry, fix it with a specific spray fixative or with very diluted glue applied with a dropper around the edges.
What paints are used for the terrain of the diorama?
Diluted acrylics are the base, complemented with powder pigments for matte and earthy finishes. Vallejo has a very complete range of textures and terrain effects; Ammo offers specific solutions for mud, dust, and dry earth that can be applied directly without the need to mix.
Can I integrate LED lighting into a diorama?
Yes, and the result can be spectacular. There are very small LED strips, 3 mm point LEDs, and battery solutions that do not require complex wiring. They are especially effective in night scenes, building interiors, or vehicle headlights.
How do I prevent the diorama from deteriorating over time?
The main enemies are dust, humidity, and direct sunlight (which fades colours). Displaying the diorama under a display case or perspex box protects against dust; avoiding direct sunlight preserves colours; and ensuring that all materials are well secured and dry prevents detachment.
What is the difference between a diorama and a vignette?
The vignette is a reduced form of diorama: a very small scene, usually with one or two figures and a minimal environment, focused on capturing a moment or a specific emotion. The diorama tends to be broader and more complex. The vignette is a perfect format to start or for quick projects between large dioramas.
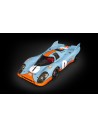
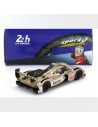
Are there dioramas with historical motorsport themes?
Yes, and it is a very active segment. From pits of the 50s and 60s with mechanics working on period cars, to circuit sections with aged asphalt and spectators in the stands. The 1/32 scale allows for the direct integration of slot cars, making this type of diorama especially attractive to classic slot enthusiasts.
How long does it take to build a diorama?
It depends greatly on the complexity. A simple vignette can be completed in a weekend; a complex diorama with several vehicles, figures, and architecture can take months of work. The important thing is to enjoy the process and not set deadlines that create unnecessary pressure.
What brands of diorama products does Ministry of Hobby recommend?
We work with Vallejo, Ammo, and Tamiya as the main references for paints, terrain effects, and finishes. For vegetation and landscaping materials, we have a selection of specialized brands that cover everything from static grass to trees and shrubs. You can consult us if you have questions about which product best fits your project.