If you have been in the world of modelling for a while, you know that spray paint holds a special place in the workshop. It does not replace the airbrush in everything, but it does not need to: for primers, bases, finishing lacquers, high coverage colours, or uniform bases over large surfaces, spray is quick, reliable, and, when applied correctly, delivers outstanding results. Whether you are preparing the chassis of a 1/32 scale racing car, priming a figure for a diorama, or applying a coat of satin varnish to a static model, choosing the right product makes the difference between an amateur finish and one that looks professional.
At Ministry of Hobby, we work with spray paints specifically aimed at modelling: slot cars, plastic or resin models, figures, and dioramas. It is not the same as decorative DIY paint, and we know it well. The formulations are designed to adhere properly to plastics, metals, and scale resins, with controlled layer thicknesses, drying times adapted for bench work, and finishes that withstand handling without chipping.
In this category, you will find primers, base colours, glossy, satin, and matte lacquers, as well as special finishes. Brands like Vallejo, Tamiya, or Kaleido are part of our regular selection, chosen for their predictable behaviour, the quality of their pigmentation, and compatibility with other paints and finishes within the same project.
Whether you are a beginner looking for your first primer spray or an experienced modeller wanting to refine the finishing process, here you will find honest information and well-selected products to make the best decision.
What is spray paint for modelling and why is it still essential
Spray paint for modelling is an aerosol formulation designed to be applied directly to scale surfaces. Unlike industrial or decorative sprays, these products are formulated with fine pigments, controlled solvents, and calibrated propellant pressures to deposit thin and uniform layers without clogging details or attacking the underlying plastic or resin.
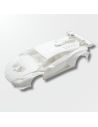
Its role in the modeller's workflow is clear: surface preparation, base colours, and final finishes. Spray primer is the almost universal first step before painting any part, whether with a brush, airbrush, or another spray. Without it, colours do not adhere well, and small surface defects remain unsealed.
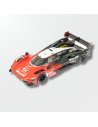
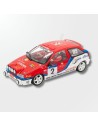
For base colours—especially on large surfaces like slot car bodies or model hulls—spray allows for homogeneous coverage in less time than it would take with a brush or airbrush. And for final finishes: a well-applied spray varnish can give a hand-painted or airbrushed piece that layer of protection and uniformity of shine that completes the work.
This is not a tool "for when there is no airbrush." More experienced modellers often combine both techniques within the same project, taking advantage of the best of each.
How to correctly choose spray paint
There are several factors to consider before deciding on a specific spray:
- Compatibility with the base material: injection plastic, resin, white metal (pewter), polyurethane… Each material has its peculiarities. Some sprays contain solvents that can attack certain soft plastics. It is always advisable to test in a less visible area or on a scrap piece before applying to the final piece.
- Desired finish type: glossy, satin, matte, or semi-matte. The finish not only affects aesthetics but also the subsequent steps: a glossy finish facilitates the application of decals, while a matte finish is ideal for figures and dioramas where we want to minimise reflections.
- Function in the process: a primer spray (whose mission is to adhere and seal) is not the same as a colour spray (which provides the base tone) or a finishing varnish (which protects and unifies the shine). Confusing them or skipping steps leads to adhesion and durability issues.
- Brand and formulation: Vallejo, Tamiya, and Kaleido are established references in the sector. Each has particularities regarding fluidity, drying time, and behaviour with additional layers. Knowing the range you usually use allows you to predict the results.
- Temperature and humidity: environmental factors that the spray amplifies compared to the brush. In cold weather, the propellant loses pressure; with high humidity, glossy finishes can become cloudy (the "blush" effect). Ideal application temperature: between 15 and 25 °C, with moderate relative humidity.
Main types and differences
Within spray paint aimed at modelling, we can distinguish several types, each with its specific function:
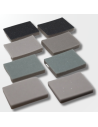
Primers
They are the foundation of any well-done work. There are primers in different base colours (grey, black, white, sand, rust red) that condition how the colour applied on top is perceived. A black primer will give depth to shadows; a white one will provide greater brightness to light colours. Some are specially formulated for resins or metals. The fine grain of modelling primers is essential: a primer that is too thick can obscure details in figures or bas-reliefs.
Base colours
Colour sprays designed to provide the main tone to the piece. They can be solid colours, metallics, or with special effects (chrome, oxidised, wood, carbon fibre). Most specialised brands offer palettes inspired by historical references, military colours, racing colours, or neutral tones for dioramas.
Finishing varnishes and lacquers
The final step. They protect the work, unify the shine of all painted areas, and prepare the surface for the last interventions (filters, pigments, decals). They come in glossy, satin, matte, and semi-matte finishes. In figure and diorama modelling, matte is king; in car bodies, glossy gives that freshly lacquered sheet metal look.
Special effects sprays
Rough textures for diorama bases, rust effects, chrome, fluorescents… a growing category that allows for very eye-catching results without complex techniques.
Technical aspects we should know
Although spray seems to be the simplest tool in the workshop, it has its own technical rules that should not be ignored:
- Application distance: the most common is between 20 and 30 cm from the surface. At a shorter distance, too much paint is deposited, forming drops or runs. At a greater distance, the paint arrives dry, and the layer becomes rough.
- Continuous movement: never stop the spray over the piece while pressing. The movement should start before pressing and finish after releasing. Short, overlapping passes are better than a single long pass.
- Thin and multiple layers: the golden rule. Better three thin layers than one thick one. Thin layers dry better, do not obscure details, and cause fewer running issues.
- Prior shaking: most sprays have a metal ball to mix the pigment. Shake vigorously for at least a minute before use, and repeat if there are long pauses during application.
- Purge after finishing: when done, turn the can upside down and press until only propellant comes out. This cleans the nozzle and prevents it from clogging for the next use.
- Compatibility between systems: in general, do not mix lacquers over acrylics without an intermediate varnish, nor apply aggressive solvents over acrylic layers. Each system has its logic, and brands specialised in modelling usually publish their compatibility guides.
Practical tips for use and maintenance
Beyond the application technique, there are work habits that make a difference in the final result:
- Prepare the surface: clean the piece of grease, dust, and mould release agent residues (especially on resins and metals). A little soapy water and a well-dried rinse work wonders for adhesion.
- Painting box: if painting indoors, a cardboard box or a specific support collects excess spray, protects the environment, and allows you to work in comfortable positions.
- Ventilation: sprays emit vapours that should not be inhaled in enclosed spaces. Always work with ventilation or outdoors when possible. An organic vapour filter mask is a smart investment.
- Storage: store sprays upright, away from direct heat and ignition sources. A closed cabinet at a stable temperature prolongs the can's lifespan.
- Can temperature: if the can is cold, the pressure is lower, and the result may be uneven. On cold days, warm the can for a few minutes in lukewarm water (not hot) before use.
Common mistakes to avoid
Even with good material, there are major mistakes that ruin hours of work:
- Applying too much at once: the most classic mistake. It causes runs that, once dry, are very difficult to correct without sanding. Less is more.
- Not priming: skipping the primer to save time often ends in paint peeling, especially on smooth plastics or resins. The time you save at the beginning will cost you later.
- Applying in adverse environmental conditions: high humidity, extreme cold, or direct wind are enemies of spray. In these conditions, postpone the session or work in a controlled environment.
- Not testing the spray before applying to the piece: each new can, even if it is from the same brand and reference, may behave slightly differently. A test pass on cardboard reveals the pressure and granularity before risking it on the piece.
- Using expired spray or one with a clogged nozzle: a spray in poor condition spits instead of atomising. The result is a blotch, not a layer. If the nozzle is clogged, replace it with one from an empty can of the same brand (they are usually interchangeable).
- Confusing finishes: applying a glossy varnish on a figure that should be matte, or vice versa. Plan the final finish before starting to avoid having to correct.
Recommendations for beginners and advanced users
If you are starting
Start with a medium grey primer from a recognised brand like Vallejo or Tamiya. It is the product with the least margin for error and the one that teaches you the most about how the spray behaves. Practice on scrap pieces or cheap models before applying to something important to you. Do not skip the priming step and do not apply more than two thin layers per session: allow to dry well between applications.
A matte varnish at the end, also in spray, will finish the work cleanly and teach you a lot about the complete process. With these three basic references (primer, base colour, varnish), you already have the structure of a functional and presentable finish.
For users with more experience
The spray is still useful even if you master the airbrush. Spray primers often provide more uniform layers on complex pieces, and some special finishes (chrome, textures) are difficult to replicate with a homemade airbrush. Exploring the Kaleido range, for example, opens up possibilities in period colours and historical references. Combining spray layers with airbrush or brush techniques for fine detailing is a common workflow for modellers seeking exhibition-quality results.
It is also worth exploring effect sprays for diorama bases: they save time and provide convincing results that you can then enrich with pigments and filters.
| Type of spray |
Main function |
Finish |
Moment of use |
| Primer |
Adhesion and sealing |
Matte / semi-matte |
Always the first step |
| Base colour |
Main tone |
Variable |
After priming |
| Gloss varnish |
Protection + shine |
Glossy |
Before decals or at the end |
| Satin varnish |
Protection + semi-matte |
Satin |
Intermediate or final finish |
| Matte varnish |
Protection + dulling |
Matte |
Final finish on figures/dioramas |
| Special effects |
Textures, chrome, rust |
Variable |
Depending on technique and project |
Frequently asked questions about spray paint for modelling
Can I use DIY spray paint for modelling?
It is not recommended. DIY sprays are formulated for large surfaces and do not take into account the delicacy of modelling plastic or the fineness of scale details. The layer thickness is greater, the drying time is usually longer, and the solvents can attack certain plastics. Always use products specific to modelling.
What primer should I use for resin?
Resins may have residues of release agent that hinder adhesion. Clean the piece well with soap and water, let it dry completely, and use a primer specific for resin or a multi-surface primer from brands like Vallejo or Tamiya. Very fine grain spray primers are the most suitable for not losing details.
How long should I wait between layers?
It depends on the product, temperature, and humidity. Under normal conditions (20 °C, moderate humidity), most modelling sprays allow for touch-ups or a second layer to be applied in 15-30 minutes. For complete drying ("to the hard"), always wait the hours indicated by the manufacturer before handling or varnishing.
Can spray varnish be used over brush acrylic paint?
Yes, with caution. Ensure that the acrylic layer is well dried and cured. Apply the spray in very thin layers at first to avoid the aerosol solvent reactivating the lower layer. Spray varnishes over acrylic are common and usually work well if drying times are respected.
What is the difference between a glossy varnish and a satin one?
The glossy finish reflects light specularly, like a car's bodywork. The satin finish gives a touch of life without reaching full gloss, commonly used on vehicles with a "factory" finish but without excess. The matte finish completely dulls reflections, ideal for figures, uniforms, and diorama elements where shine would break realism.
Can I apply spray in an enclosed space?
Only if you have good ventilation. The vapours from propellants and solvents should not accumulate. Open windows, use a painting box to concentrate the spray cloud, and if you paint frequently indoors, invest in a mask with an organic vapour filter.
Can modelling spray be used on metal?
Yes, but it requires preparation. Lightly sand the metal surface to give it grip, clean well the sanding residues, and apply a specific primer for metal before the colour. Some modelling primers work well on metal, but check the manufacturer's instructions.
How do I avoid the "orange peel" effect?
This rough effect appears when the spray reaches the surface too dry (excessive distance) or when the particles do not flow well (low temperature or poorly shaken can). Maintain the correct distance (20-25 cm), shake the can well, and work at the appropriate temperature. If the effect has already appeared, you can correct it by gently sanding with very fine grit sandpaper and applying a new layer under better conditions.
Can I mix different brands of spray in the same project?
In general, yes, especially if you apply a layer of varnish in between that acts as an isolator. It is most common to use primer from one brand, colour from another, and varnish from a third. Still, always do a test before applying to the main piece, especially if mixing systems (lacquers over acrylics or vice versa).
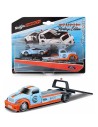
What spray do you recommend for slot car bodies?
It depends on the finish you are looking for. For priming over plastic, Tamiya and Vallejo offer very good results. For body colours with a glossy finish, Tamiya sprays are a classic reference. If you are looking for more specific or historical colours, Kaleido has interesting references. And for the final varnish, a modelling gloss will give that lacquered sheet metal look that looks so good on scale cars.
When should I use a special effects spray?
Special effects sprays (textures, chrome, rust) are ideal when you want convincing results without complex techniques. Rough textures work especially well for diorama bases, dirt or asphalt floors. Chrome can add realism to metallic details. Apply them as independent layers, respecting drying times and always over a previous primer.